Erosion
A unit with lesson plans, activities, & lab notes

Riddle
This thing all things devour: birds, beasts, trees, and flowers; gnaws iron, bites steel: grinds hard stones to meal; slays kings, ruins towns, and beats high mountains down.
Introduction
- Introduction
- Big ideas, concepts, facts, & outcomes
- Science content concepts & outcomes
- Inquiry & science process concepts
- Pedagogical overview
- Activities sequence
- Focus questions
- Materials
- Scoring guide suggestions
- Unit activity sequence
- Activity 1 - Model of a landform
- Activity 2 - Water Erosion
- Activity 2a - Salt block erosion
- Activity 3 - Wind Erosion
- Activity 4 - Glacier Erosion
- Activity 5 - Temperature Erosion
- Activity 6 - Chemical Erosion
- Activity 7 - Mountain Building
- Activity 1 - Model of a landform
- Lab notes
- Lab note 1 - Model of a landform
- Lab note 2 - Water Erosion
- Lab note 3 - Wind Erosion
- Lab note 4 - Glacier Erosion
- Lab note 5 - Temperature Erosion
- Lab note 6 - Chemical Erosion
- Lab note 7 - Mountain Building
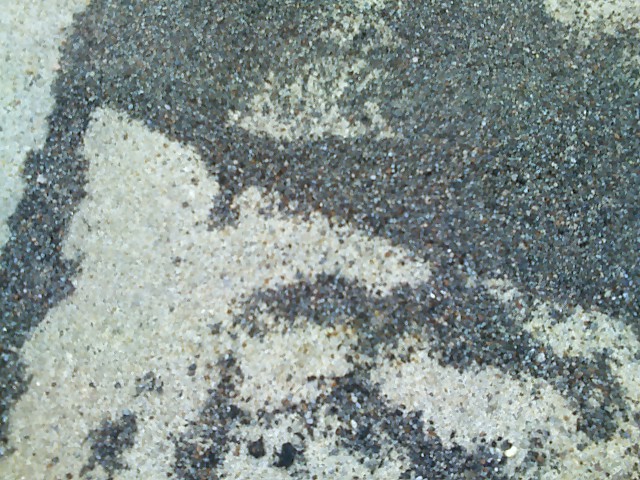
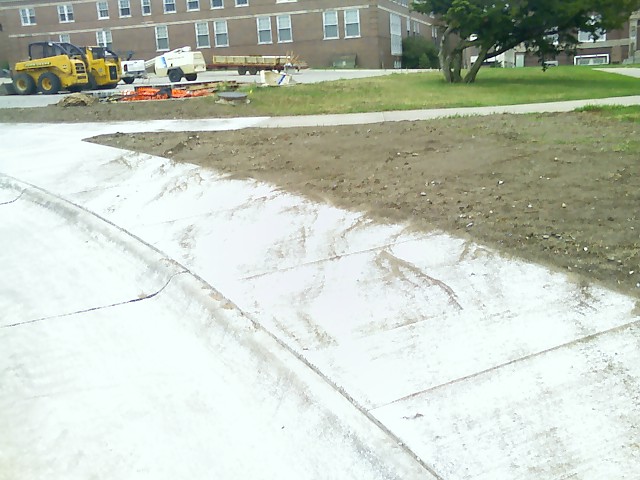
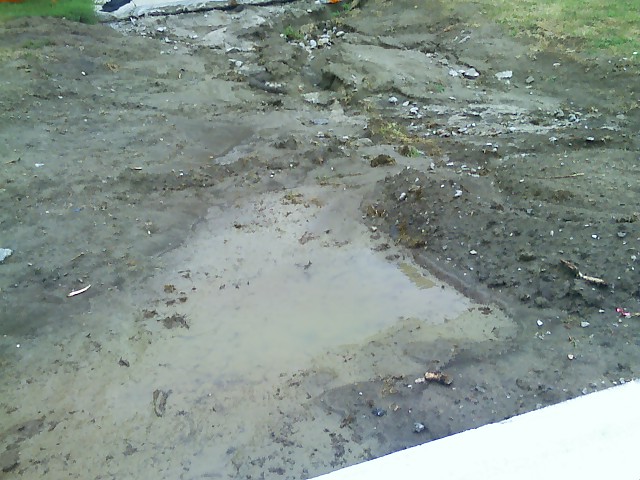
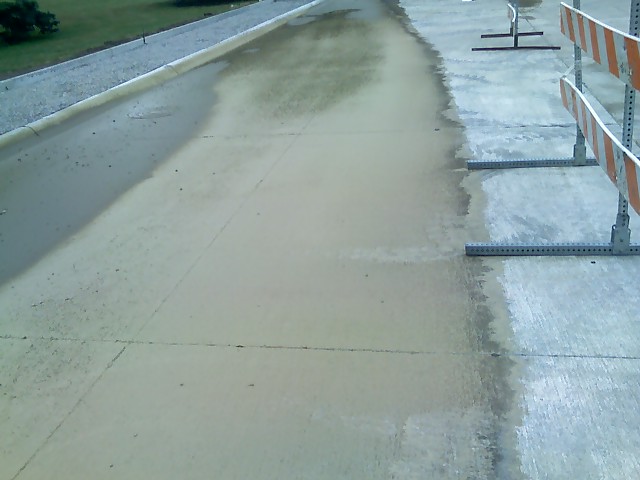
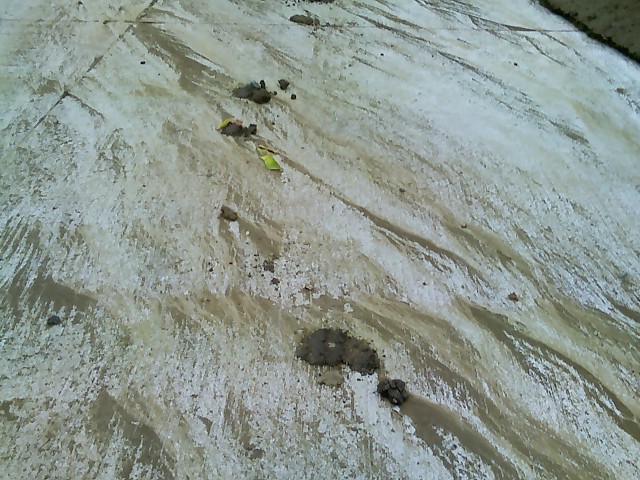
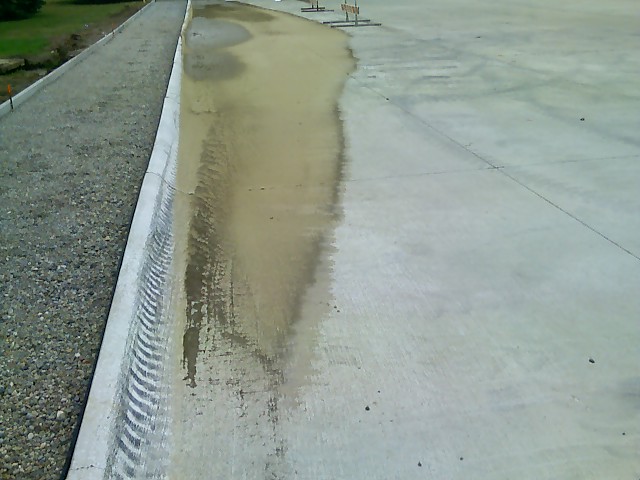
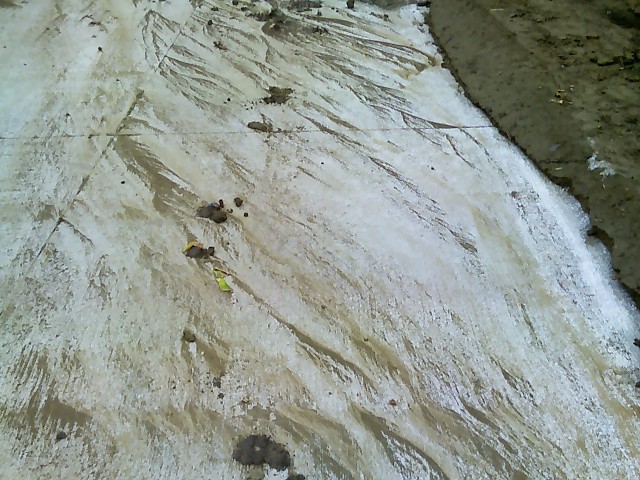
- Support materials - Includes picture Album of erosion pictures
A sequence of plans to facilitate a review and develop a deeper understanding of landforms and erosion.
Water plays an important role in erosion by carrying away material that has been weathered and broken down. When an area receives more water (in the form of rain, melting snow, or ice) than the ground can absorb, the excess water flows to the lowest level, carrying loose material with it.
Glaciers are important agents of erosion. Although a glacier moves slowly, it gradually removes all the loose material from the surface over which it travels, leaving bare rock surfaces when the ice melts. Besides removing loose material, glaciers actively erode the solid rock over which they travel. Rock fragments that become embedded in the bottom and sides of the moving ice mass act as an abrasive, grinding and scouring the bedrock which forms the walls and floors of mountain valleys.
Wind blowing across bare land lifts particles of sand and silt but leaves behind larger pebbles and cobbles. Eventually, a surface layer of closely packed stones, called a desert pavement, is formed as the sand and silt is removed.
The following activities illustrate various types of erosion to increase learner’s awareness so they might make informed and responsible decisions for land use. Erosion is a significant force responsible for shaping landscapes. Learning about erosion will help children not only identify one factor that sculpts the Earth’s surface, but also enable them to strategize means to preserve our natural resources.
Related topics of study:
- Constructive forces - activities on geophysical forces as constructive and destructive. Landslides,volcanic eruptions, and tectonic plate movement.
- Watersheds - activities to investigate different watersheds and variables used to develop descriptions, operational definitions, and models as explanations of watersheds
- Streams, rivers, erosion, flooding, and stream tables to model their changes and evolution in watersheds - Earth science (middle grades)
Planning information
Learner background information
A plan designed for learners who have prior knowledge in cause and effect, use of observations to make inferences, models as explanations for observable and non observable events, relative position, and working in groups.
Intended learnings & learners thinkings
Content Big ideas, concept & facts, & outcomes
(Source concepts & misconceptions)
Big ideas and specific outcomes:
Erosion is a natural process that changes and moves earth materials. Geophysical changes can be beneficial and harmful. It is important to know how water, air, temperature, and chemicals erode land and human made objects. And their effects on agriculture, pollution, changes of habitat, and other structures.
Concepts and facts
- Erosion creates problems for maintaining healthy environments to sustain life, agriculture, habitats, and human made structures.
Outcome
Describe how erosion affects healthy environments what can be done to limit its negative effects and better sustain life, agriculture, habitats, and human made structures.
Science concepts: physical, earth, life
Big idea
Erosion is a continuous process of the wearing away and movement of earth and human materials. It is caused by water, air, temperature change, and chemicals. Humans can affect it in both positive and negative ways.
Related concepts
- Erosion is the wearing away and moving of earth.
- Erosion is a continuous process of the wearing away of the surface of the earth.
- Wind, water, and ice shape the Earth.
- Weathering is a gradual physical and chemical wearing away of rocks.
- The surface of the earth changes due to slow processes, such as erosion and weathering, and some changes are due to rapid processes, such as landslides, volcanic eruptions, and earthquakes.
- Human activity has changed the Earth (farming, reducing forests, release of chemicals, ) and decreased the capacity of the environment to support some forms of life.
- Soil consists of weathered rocks, water, gases, and decomposed organic materials from dead plants, animals, and bacteria.
- Destructive forces include weathering and erosion.
- Earth materials provide shelter, water, and nutrients for animals survival.
Outcome
- Describe erosion as a continuous process that is caused by water, air, temperature change, and chemicals. A process that wears away and moves earth and human made materials. It is a natural process, but is affected by humans in both positive and negative ways.
Anticipated learner thinkings & misconceptions
Inquiry, process, & cross cutting concepts & skills
Inquiry (How science inquires for understanding: process, skill, methodology, practice)
When I experiment I collect observations that describe how different properties change (become variables) when objects and systems interact. This helps me make claims to explain what is happening, and make models to predict what might happen in the future.
Related concepts and facts
- Observed changes can be described as changes of properties (variables).
- Variables are observations of a property that changes - size, shape, temperature, amount, volume, rate, ...
- When people disagree on an observation, they usually make more and better observations.
- Observation, creativity, and logical argument are used to explain how variable changes effect resulting observations.
- Observed changes can be explained as being caused by changes of variables (changes of properties/ characteristics).
- Explanations are based on observations.
- Evidence is observation.
- Inference is an explanation based on observation.
- When people disagree on explanations, they can make more observations or change their explanation.
Outcome
Describe change as a result of interactions. Describe those interactions as changes of a characteristic/ property (variable) that interacts with the object that changes.
Specific outcomes -
- Describe changes caused by chemicals, air, water, ice, and temperature on earth materials.
Cross cutting
Systems, Order, & Organization; Evidence, Models, and Explanations; Constancy, Change, and Measurement; Evolution and Equilibrium; Form and Function
See more process concepts & misconceptions
Related concepts and facts
- Observational data and reasoning is used to explain interactions.
- Evidence is something that
is observed and can be used to understand what is happening and make predictions
about future changes.
- Explanations are based on observation derived from experience or experimentation and are understandable.
- Pictures or symbols can represent objects.
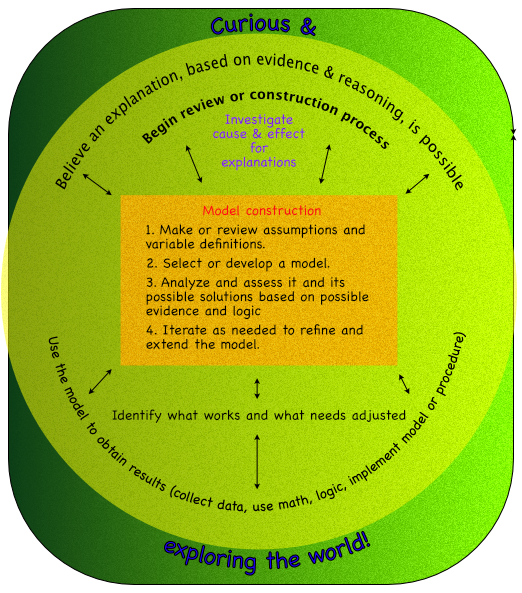
- Models are structures that correspond to real objects, events, or classes of events that have explanatory and predictive power (physical objects, plans, mental constructs, mathematical equations, computer simulations...) that may or may not be observed with real objects, systems, and events.
- Model is an explanation based on observations, facts, laws, inferences, thought, and reasoning.
- Models represent systems or things used as an example to follow or imitate to provide an explanation.
- Models can be used to think about events or processes that happen very slow, fast, or on a too small or large scale to change easily or safely.
- Mathematical models can be displayed on computers and changed to see what happens.
- Models are used to represent things in all dimensions of science physical, earth, and life science.
- Models are created with similar processes, which can be an algorithm or procedure. Such as in the diagram.
- A model, though different from the real thing, can be used to learn something about the real thing.
- Seeing how a model changes may suggest how the real thing works if the same were done to it.
- Models make predictions.
- More than one model can represent the same thing or event.
- The kind of model and its complexity depend on the purpose of using the model.
- Models are never exact representations.
- A model that is too limited or complicated may not be useful.
- A model represents entities and the relationships between them.
- There are two basic types of models, physical and conceptual. Conceptual communicate through words and drawings, or can be physical and demonstrable.
- Models help generate ideas, solve problems, make predictions, help think.
- Models can be used to represent new ideas and inventions.
Outcome -
- Make observations of change, identify variables associated with the change, and create explanations of how the variables effect those changes.
Specific outcomes -
- Make observations of change to limestone, chalk, sand, clay, and other earth material.
- Identify variables associated with the change like strength, volume, mass, surface area, rate of motion, and time of exposure of a chemical on earth or human made materials.
- Identify variables associated with the change like strength, volume, mass, surface area, rate of motion, and time of exposure of air and water stream on earth or human made materials.
- Explain how these variables effect the changes.
- Explain how erosion affects humans.
- Explain how humans can affect erosion in negative and positive ways and why it's important to do so.
Perspectives
Engineering & Technology
- People have always had problems and invented tools and techniques (ways of doing something) for scientific inquiry and technological design.
- The two have similarities and differences.
- Scientists propose explanations for questions about the natural world, and engineers propose solutions relating to human problems, needs, and aspirations.
- Technologies exist within nature and so they cannot contravene physical or biological principles. Technological solutions and technologies they have side effects, costs, carry risks, and provide benefits.
- Many different people in different cultures have made and continue to make contributions to science and technology.
- Technology is essential to science, because it provides instruments and techniques that enable observations of objects and phenomena that are other wise unobservable due to factors such as quantity, distance, location, size, and speed.
- Technology provides tools for investigations, inquiry, and analysis.
- Science and technology are reciprocal.
- Science helps drive technology, as it addresses questions that demand more sophisticated instruments and provides ideas for better instrumentation and technique. Technological designs have constraints that engineers, architects, and others must take into account to solve practical problems.
- Some constraints are unavoidable, for example, properties of materials, or effects of weather and friction; other constraints limit choices in the design, for example, environmental protection, human safety, and aesthetics.
- The knowledge base for science is recorded in print and electronic media and can be found and understood by people in and out of classrooms
Personal and Social Science
- People have always searched for explanations for geographical explanations.
- Science provides explanations for geographical explanations to understand changes in our world.
- The application and the use of models in science and technology can and will benefit society.
- Model helps me internalizing or abstracting understanding.
- Changes in the environment can be natural or influenced by humans.
Nature of Science
- Science can provide ideas for our protection and desire for a better life.
- Scientists use models.
History of science
See also Concepts & misconceptions also science, math, technology timeline
- Science provides explanations for geographical explanations to understand changes in our world.
- People have practiced science and technology for a long time.
- Science develops over time.
- Science investigators such as
Scoring guides suggestions (rubric)
Top level
- Erosion is a continuous process of the wearing away of the surface of the earth. Weathering is a gradual physical (air, wind, ice, & temperature change) and chemical wearing away of rocks.
- Erosion is the washing and blowing away of soil.
Lower level
Strategies and activities to achieve intended learnings
Based on learning cycle theory & method
Pedagogical Overview
Activities Sequence to provide sufficient opportunities for students to achieve the targeted outcomes.
Make sure learners have the prior knowledge identified in the background information.
- Activity 1 - Model of a landform
- Activity 2 - Water Erosion
- Activity 2a - Salt block erosion
- Activity 3 - Wind Erosion
- Activity 4 - Glacier Erosion
- Activity 5 - Temperature Erosion
- Activity 6 - Chemical Erosion
- Activity 7 - Mountain Building
Focus question
Unit focus question:
- What is erosion?
- What causes erosion?
- How does erosion affect humans?
Sub focus questions:
- What is chemical erosion?
- What is acid rain?
- How does erosion make different geographical forms?
- What are glaciers?
- How do they cause erosion?
- What happens to earth materials when temperatures change?
- How do mountains stand up to downpours or cloudbursts!
Materials
- Trays, chalk,limestone, diluted hydrochloric acid, vinegar, Non oily clay (not modeling clay), outdoors water hose, water, pebbles, coins, plastic chips, sand, ice cubes, marbles, insulated tongs, goggles, dish pans, potting soil, rocks, watering can
- Cardboard box with all sides. Remove part of the top to provide a good view of the interior, cover it with transparent plastic wrap, or plexiglass. Then make a straw sized hole on one side.
- Lab note 1 - Chemical Erosion
- Lab note 2 - Water Erosion
- Lab note 3 - Wind Erosion
- Lab note 4 - Glacier Erosion
- Lab note 5 - Temperature Erosion
- Lab note 6 - Mountain Building
Resources
Lesson Plans
Activity 1 Model of a Land Form
First written by Angie Rief & Todd Ariens
Materials
- Materials: Plastic cup, damp sand, foil pan, pebbles, dropper and water.
- Lab note
Focus questions:
- What shapes the surface of the Earth?
Learning outcomes:
- Explore a model of the Earth's surfaces and explain how different forces change and shape it.
Suggested procedures overview:
- Put learners in groups, focus their attention, and assess their initial understanding of the focus questions.
- Activity - Observe a model of the Earth's surfaces and explain how different forces change and shape it the model and infere similar changes for the Earth.
Exploration -
- Put learners in pairs.
- Ask. What shapes the surface of the Earth?
- Ask. What happens when it rains on a mountain?
- Tell them they are going to make a model of a mountain out of damp sand.
- Tell them to place the sand on one side of the pan.
- Then cover the mountain with pebbles.
- Pat them gently so that they will stay in place.
- Place a book under the end of the pan that has the mountain.
- Ask what would happen if they drop a single drop of water?
- Five drops of water?
- And slowly pour water on the mountain?
- Have them experiment and then return for a class discussion.
Invention -
- Regroup as a class
- Discuss.
- How did one drop of water affect the sand and pebbles?
- How did five drops of water affect the sand and pebbles?
- How did the poured water affect the sand and pebbles?
- Explain how much of a difference there was, and how the different amounts changed the results.
- How can moving water affect landforms?
- How do different amounts cause different changes?
- Why is this information important to understand the Earth's surface?
- When and for whom is this information important?
- Based on your observations how does water cause erosion?
- How long would it take a grain of sand to move down a mountain?
Discover
How do scientists explain changes like this?
Activity 2 - Water Erosion
First written by Angie Rief & Todd Ariens
 Materials:
- Non oily clay (not modeling clay), tray or pan, outdoors water hose, pebbles, coins, plastic chips
- Lab note
Focus questions:
- How does erosion make different geographical forms?
Learning outcomes:
- Describe how water erosion can make different kinds of geographic features.
Suggested procedures overview:
- Put students in groups, focus their attention, and assess their initial understanding of the focus questions.
- Activity - Explore with clay and water and use the results to describe water erosion and pinnacles, river valleys, canyons, ...
Exploration
- Before class form a mound of non oily clay into a level mass about 5-10 centimeters across and place it into a tray or large pan.
- Press pebbles, coins, and plastic chips into the top surface of clay.
- Might want to go outside where you can lightly spray the clay from above and not worry so much about clean-up.
- Students should note in their science journals how the spray washes the clay away, while the pebbles, coins, and plastic chips cause pinnacles to form.
- They should be able to infer that harder surfaces are more durable in the face of water erosion.
- Return to the classroom.
- Have them draw before, during, and after diagrams of what happened in their journal or lab notes.
- Display some diagrams so all can see.
Invention
- Recall and review.
- Ask:
- What caused the clay to run off?
- Why did the pinnacles form?
- What other materials might have protected the clay?
- Can you think of any examples of such pinnacle formations in nature?
- What other examples of water erosion can you think of?
Discover
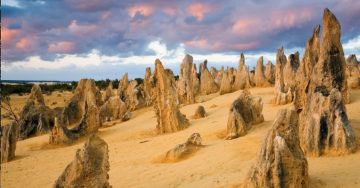
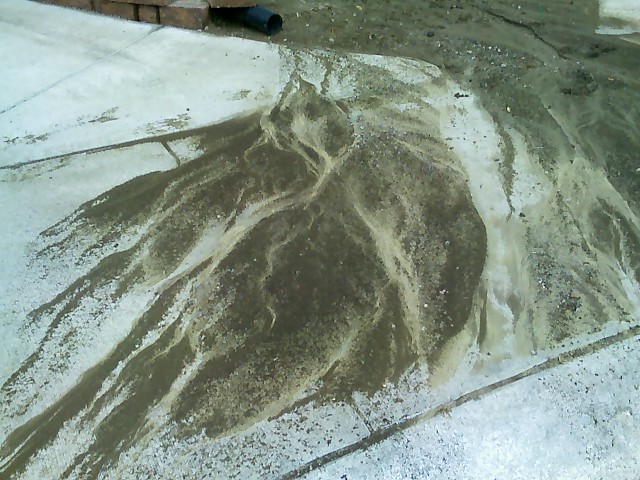
Use Activity 2a or Find pictures to display and discuss the formation of pinnacles and other geographical formations caused by erosions: Grand Canyon, Grand Tetons National Park, and Monuments National Park.
Activity 2 -a
Materials:
Salt block, fish tank water pump, and tub large enough to hold salt block and water
Exploration
- Place salt block into tub.
- Have one end of the block propped up.
- Put enough water into tub to allow fish tank pump to run.
- Position pump so that water runs from elevated end of salt block to lower end.
- Ask. What do you think will happen?
- Let the water run over salt block for five days.
- Each day have them write down changes that have occurred.
Invention
- At the end of five days, discuss what has happened
Discover
- Relate to the Grand Canyon.
Activity 3 - Wind Erosion
First written by Angie Rief & Todd Ariens
Materials
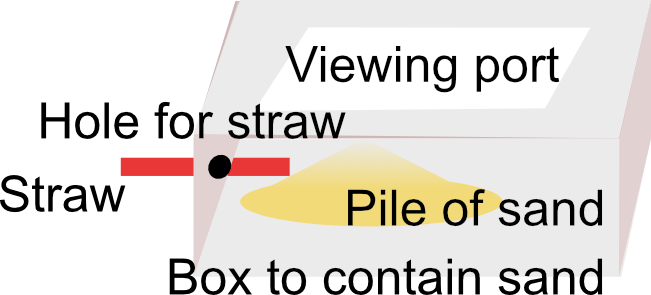
- Cardboard box with all sides. Remove part of the top to provide a good view of the interior, cover it with transparent plastic wrap, or plexiglass. Then make a straw sized hole on one side.
- Sand, water, plastic chips, pebbles, coins
Focus questions:
- Can air cause erosion?
Learning outcomes:
- Make a sand box to blow air across sand and describe the movement of sand.
Suggested procedures overview:
- Put students in groups, focus their attention, and assess their initial understanding of the focus questions.
- Activity - Decide on how to make a sand box. Then, make a sand box to blow air across sand and describe the movement of sand, how wind causes erosion, and how different materials will erode at different rates.
Exploration
- Put learners in groups.
- Warning - require students to wear goggles.
- Challenge the learners to describe how to use the materials to explore the interactions of wind with sand.
- Possible procedure:
- Remove enough of the box top to provide a good view of the interior.
- Place a pile of sand in the center of the box bottom.
- Make a straw sized hole on one side.
- Cover the top hole with transparent plastic wrap, or plexiglass.
- Insert a straw in the hole on the side of the box.
- Use the straw to blow over the sand.
- Record before, during, and after results.
- Reform the sand pile.
- Select some materials (water, plastic chips, pebbles, coins) and use them to to try and prevent the sand from moving.
- Then blow again and record the results.
- Exploration questions:
- What happened to the sand as you blew?
- Observe not only how the sand moved from the pile, but where it went and the new shapes or patterns it formed.
- Could you make the whole pile move if you blew long enough?
- What materials did you choose to add to your reformed piles?
- Why did you choose these materials?
- What were the results?
- Explain the patterns created?
- Display results so all can see during discussion.
Invention
- Share and discuss results.
- What happened to the sand as you blew?
- How did the sand move from the pile?
- Where did it go?
- What new shapes or patterns did it formed?
- Could you make the whole pile move if you blew long enough?
- What materials did you choose to add to your reformed piles?
- Why did you choose these materials?
- What were the results?
- What happened to the sand as you blew?
- How did the sand move from the pile?
- Where did it go?
- What new shapes or patterns did it formed?
- Explain how you believe the patterns were formed?
Discovery
- Where have you seen examples of wind erosion in nature?
- Find pictures of the sand dunes from the Sahara and Kalahari Deserts in Africa.
- The Dust Bowl of the 1930’s could be a topic to discuss. Read - Out of the Dust by Karen Heese (1997). and The Worst Hard Time: The Untold Story of Those Who Survived the Great American Dust Bowl By: Timothy Egan
Activity 4 - Glacier Erosion
First written by Angie Rief & Todd Ariens
Materials
- Ice cubes, sand, modeling clay, paper towel
- Lab notes
Focus questions:
- What are glaciers? How do they cause erosion?
Learning outcomes:
- Explore with ice, clay, and sand to see how the ice interacts with them and use the observations to describe how glaciers cause erosion.
Suggested procedures overview:
- Put students in groups, focus their attention, and assess their initial understanding of the focus questions.
- Activity - Explore with ice, clay, and sand to see how the ice interacts with them and use the observations to describe how glaciers cause erosion.
Exploration
- Ask. What do you know about glaciers?
- How do they cause erosion?
- Press an ice cube against the flat surface of modeling clay and move it back and forth several times and record observations.
- Draw a before and after diagram.
- Then place a small pile of sand on the clay. The ice cube should be placed on top of the sand and left there for one minute.
- Then pick up the ice cube and observe the surface of the cube that was touching the sand and record their observations.
- Draw a diagram
- The same side of the ice cube should then be placed on the sandy part of the clay and moved back and forth several times.
- Draw a diagram.
- When ice cube is melted, the sand should be wiped away from the surface of the clay, and the clay’s surface texture should be recorded.
- Draw a diagram.
- Use your diagrams to answer the following questions.
- What happened to the clay the first time you wiped the cube against it?
- What happened to the ice cube after it sat on the sand?
- What did the surface of the clay look like after you rubbed the cube against it the second time?
- Display diagrams so all can view.
Invention
- Use the class diagrams to discuss the questions.
- What happened to the clay the first time you wiped the cube against it?
- What happened to the ice cube after it sat on the sand?
- What did the surface of the clay look like after you rubbed the cube against it the second time?
- Ask. How do the results relate to a glacier?
- Discuss. glaciers are made of ice and they scrape the earth materials that are below them. As they do they can be moved along with the glacier and create a moraine ahead of them.
Discover
- Does glacial erosion still occur today or is it just an ice age phenomenon?
- Find examples of Glacier erosion.
- Pictures of Hubbard Glacier in Alaska and a picture of the Matterhorn in Switzerland, a geographical anomaly produced by glaciers can be found.
Activity 5 - Temperature Erosion
First written by Angie Rief & Todd Ariens
Materials:
- 1 pot boiling water, marbles, cups of ice, cups of water, insulated tongs, goggles
- Lab notes
Focus questions:
- What happens to earth materials when temperatures change?
Learning outcomes:
- Explore and explain what happens when earth materials change temperatures.
Suggested procedures overview:
- Put students in groups, focus their attention, and assess their initial understanding of the focus questions.
- Activity - Explore and explain what happens when earth materials change temperatures.
Exploration
- Organize learners into pairs and groups.
- Review safety rules thoroughly
- The teacher should have one container of boiling water with marbles in it.
- Learners should go to the teacher to get a hot marble. The teacher will place the marble directly from the boiling water into a glass of water.
- They should then put the marble into the jar full of ice.
- Observe and answer the questions:
- What happened to the marbles?
- What do you think caused the marbles to crack?
- Can you give examples of temperature erosion?
- How might we prevent erosion due to temperature?
- Display results so all can observe.
Invention
- Reform as a class and discuss answers to the questions.
- What happened to the marbles? they cracked
- What do you think caused the marbles to crack? a rapid change of temperatures caused them the materials to change shape (contract or expand) in different directions at different rates of time causing their bonds to break.
- Can you give examples of temperature erosion? cracks in rocks, pavement, metal, wood, plastic,
- How might we prevent erosion due to temperature? allow for expansion and contraction. Encourage different answers.
- Conclude temperature erosion breaks down earth materials along with wind, and water.
Discover
- As a class go outside and observe the sidewalk and driveway.
- Observe the cracks and discuss the possibility they are perhaps due to temperature erosion.
- Also ask about the grooves in the sidewalk and if any have caulk or other materials in them.
- How do they prevent temperature erosion?
Activity 6 Chemical erosion
First written by Angie Rief & Todd Ariens
Materials
- Glass tray, plastic tray, chalk, diluted hydrochloric acid (safety demonstration), vinegar
- Lab note
Focus questions:
- What is chemical erosion? What is acid rain?
Learning outcomes:
- Explore the interactions of acid rain on limestone and explain the acid will react to something in limestone (calcium carbonate) and fizz (make carbon dioxide). Rocks that don't fizz (react), don't have calcium carbonate.
Suggested procedures overview:
- Put learners in groups, focus their attention, and assess their initial understanding of the focus questions.
- Activity - Observe a dilute acid interact with limestone and conclude chemicals can erode rock.
Exploration -
- Put learners in pairs.
- Ask. What is chemical erosion?
- Place a piece of flat limestone or chalk on a glass tray.
- Demonstrate dilute hydrochloric acid or skip to vinegar.
- Gathered learners around a table.
- Ask. Guess out loud what you think will happen when drops made to simulate acid rain (dilute hydrochloric acid) are dropped onto the limestone.
- Begin to drop one drop at a time.
- Add drops from time to time for several minutes, asking students to describe what they observe. fizzing, discovering that a hole is slowly forming. The fizzing is caused when an acid dissolves calcium carbonate in the limestone. This releases carbon dioxide a gas that rises to the surface as bubbles. Rocks that don't contain calcium carbonate won't fizz.
- Ask. How do some chemicals affect rocks?
- Divide the students into groups. Direct them with the following:
- Place a piece of limestone into the plastic container.
- Slowly add drops of vinegar (acid rain) using the eyedropper.
- Record your observations.
- Make before and after diagrams.
- Display diagrams so all can see
Invention -
- Regroup as a class
- Discuss why such a reaction occurred.
- Some specific questions:
- What do you think the unknown liquid might be?
- What do you think the liquid is doing to the limestone?
- What happened when you dropped the vinegar on the chalk?
- Why do you think this happened?
- What materials do you think would react the same way as the chalk and limestone?
- What type of reaction do you think occurred in these experiments?
- After asking the above, discuss the term chemical reaction. a process that rearranges the molecular or ionic structure of matter (substance). Different than a physical change (changes form not the matter) or nuclear reaction (changes the subatomic particles).
- Can show them pictorial examples of chemical erosion (Mammoth Cave in Kentucky, the Carlsbad Caverns in New Mexico, and results of acid rain) be able to explain why these are examples of chemical erosion. Solution caves form when rainwater percolates through the soil, picks up carbon dioxide (from both the air and soil), forming a weak acid. This acidic water squeezes between the small cracks and layers of bedrock, such as limestone, and dissolves out a small channel in the rock for the water to flow.
Discover
Activity 7 - Mountain Building
First written by Angie Rief & Todd Ariens
Materials
- Dish pans, potting soil, rocks, plastic chips, ice cubes, sand, water, and watering can
- Lab notes
Focus questions:
How do mountains stand up to downpours or cloudbursts?
Learning outcomes:
Explore different kinds of earth materials and how they stand up to a large amount of water.
Suggested procedures overview:
- Put students in groups, focus their attention, and assess their initial understanding of the focus questions.
- Activity - Explore different kinds of earth materials and how they stand up to a large amount of water.
Exploration
- Organize learners into five groups.
- Tell them they are going to build a mountain.
- A mountain that they believe will hold if a watering can full of water is poured over it.
- Group will be assigned to build their mountain out of the following [Plus All groups will have access to a certain number of plastic chips, pebbles, & ice cubes.]
- Sand,
- Rocks and a small amount of sand,
- Soil, and
- Any combination of sand, rocks, and soil.
- Any combination of sand, rocks, and soil.
- The groups must devise a building plan writing down all suggestions.
- Then groups must select and finalize a building plan.
- Then write down what their final building plan consists of and why they think this is the best structure to withstand water.
- Students will be allowed to observe all groups’ completed structures and make predictions. (May want to record predictions on board.)
- The students should then build their mountains.
- Then empty the watering can of water on them.
- Students should record the results and explain why they think such an outcome occurred. The students must suggest improvements to their structure and explain why they think such improvements will be beneficial.
- Have a class discussion.
Invention
- Regroup as a class and groups demonstrate their projects.
- Ask.
Discover
Lab Notes for activities
Lab notes 1 - Model of a landform
Materials
- Lab notes
Focus questions:
- Can chemicals dissolve rock?
Exploration
Draw before and after diagrams.
How did one drop of water affect the sand and pebbles?
How did five drops of water affect the sand and pebbles?
How did the poured water affect the sand and pebbles?
Summarize how different amounts changed the results.
Why is this information important to understand the Earth's surface?
When and for whom is this information important?
Based on your observations how does water cause erosion?
How long would it take a grain of sand to move down a mountain?
How do scientists explain changes like this?
Lab notes 2 - Water Erosion
Materials:
- Non oily clay (not modeling clay), tray or pan, outdoors water hose, pebbles, coins, plastic chips
Focus questions:
How does erosion make different geographical forms?
Challenge
Observe the demonstration and describe how it relates to the picture of pinnacles.
Draw before and after diagrams
Summary
What caused the clay to run off?
Why did the pinnacles form?
What other materials might have protected the clay?
Can you think of any examples of such pinnacle formations in nature?
What other examples of water erosion can you think of? (Rivers, valleys, canyons, ...)
Lab notes 3 - Wind erosion
Materials
- Cardboard box with all sides. Remove part of the top to provide a good view of the interior, cover it with transparent plastic wrap, or plexiglass. Then make a straw sized hole on one side.
- Sand, water, plastic chips, pebbles, coins
- Lab notes
Focus questions:
- How does air cause erosion?
Challenge
Use the materials to explore the interactions of wind with sand alone and wind and sand with different materials.
Procedure to explore wind and sand.
- Wear goggles when experimenting.
- Make a sandbox to explore wind.
- Place a pile of sand in the center of the box bottom.
- Make a straw sized hole on one side.
- Cover the top hole with transparent plastic wrap, or plexiglass.
- Insert a straw in the hole on the side of the box.
- Use the straw to blow over the sand.
- What happens when you change how hard you blow through the straw?
- What happens if the hole was a slit and a fan blew air into the box?
Explore wind and sand alone.
Record before, during, and after results.
Summary
What happened to the sand as you blew?
How did the sand move from the pile?
Where did it go?
What new shapes or patterns did it formed?
Could you make the whole pile move if you blew long enough?
Explore sand with different materials and wind
Reform the sand pile.
Select some materials (water, plastic chips, pebbles, coins) and use them to to try and prevent the sand from moving.
Record before, during, and after results.
Summary
What materials did you choose to add to your reformed piles?
Why did you choose these materials?
What happened to the sand as you blew?
How did the sand move from the pile?
Where did it go?
What new shapes or patterns did it formed?
Explain how you believe the patterns were formed?
Lab notes 4 - Glacier Erosion
Materials
- Ice cubes, sand, modeling clay, paper towel
Focus questions:
- What are glaciers? How do they cause erosion?
Challenge
Explore with ice, clay, and sand to see how the ice interacts with them and use the observations to describe how glaciers cause erosion.
Possible procedure
- Press an ice cube against the flat surface of modeling clay and move it back and forth several times and record observations.
- Draw a before and after diagram.
- Then place a small pile of sand on the clay. The ice cube should be placed on top of the sand and left there for one minute.
- Then pick up the ice cube and observe the surface of the cube that was touching the sand and record their observations.
- Draw a diagram
- The same side of the ice cube can then be placed on the sandy part of the clay and moved back and forth several times.
- Draw a diagram.
- When ice cube is melted, the sand should be wiped away from the surface of the clay, and the clay’s surface texture can be diagrammed.
- Draw a diagram.
- Use your diagrams to answer the following questions.
Diagrams
What happened to the clay the first time you wiped the cube against it?
What happened to the ice cube after it sat on the sand?
What did the surface of the clay look like after you rubbed the cube against it the second time?
Lab notes 5 - Temperature Erosion
Materials
- 1 pot boiling water, marbles, cups of ice, cups of water, insulated tongs, goggles
Focus question
What happens to earth materials when temperatures change?
Challenge
Explore and explain what happens when earth materials change temperatures.
Lab notes 6 - Chemical erosion
Materials
- Lab notes
Focus questions:
- Can chemicals dissolve rock?
Demonstration
- Place a piece of limestone into the plastic container.
- Slowly add drops of vinegar (acid rain) using the eyedropper.
- Record your observations.
Draw before and after diagrams.
Describe what acid can do to rock.
Check out ... Mammoth Cave ...
Lab notes 7 - Building a mountain
Materials
- Dish pans, potting soil, rocks, plastic chips, ice cubes, sand, water, and watering can
Focus question
How do mountains stand up to a downpour or cloudburst!
Challenge
Explore how different kinds of mountains interact with a downpour.
Brainstorm ideas on how to build your mountain.
Brainstorming Rules:
- Accept all suggestions (no criticism) or bad ideas now.
- Encourage creativity. The wilder the idea the better.
- Build on ideas. Encourage combinations, improvements, free wheeling, and hitch-hiking.
- Generate a large number of ideas.
- Everyone says their idea out loud and each writes their own ideas.
- Use visuals: diagrams, sketches, webs, maps,
- Stay focused.
Ideas:
Final plan
Results for all mountains.
What I learned ...
Support materials
Home: Pedagogy - theory, curriculum, learning, human development, & teaching
Home: Science - knowledge base, activities, pedagogical knowledge in all dimensions