Levers unit:
Overview
- Overview
- Big ideas, concepts, facts, & outcomes
- Pedagogical overview
- Activities sequence
- Activity 1 Lever - demonstrate & explore a lever, introduce terms & identify possible advantages
- Activity 2 Lift the Load - Explore how lever systems make lifting heavy loads easier.
- Activity 3 - Lift the Load alternatives. Explore different positions of efforts, loads, & fulcrum
- Activity 4 - Lever Classes investigate how the location of the fulcrum allows a person to classify a lever
- Activity 5 - Real - World Levers discuss and explore levers found in the world
- Activity 6 - Prepare a summary presentation about levers & the different classes
- Focus questions
- Materials
- Scoring guide suggestions
- Lab notes
- Lab note 1 - Lever
- Lab note 2 - Lift the load
- Lab note 3 - Lift the load
- Lab note 4 - Lever classes
- Lab note 5 - Real world levers
- Lab note 6 - Classes of levers
- Fact sheets
- References
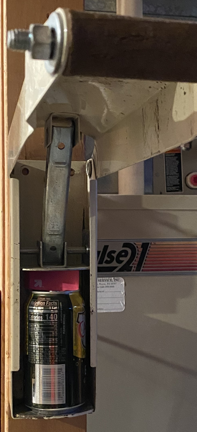
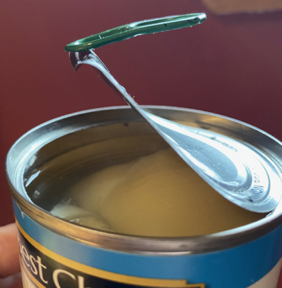
We use levers more often than we realize. The can on the left is easy to open because of the actions of two levers: tab and lid.
This unit includes plans, to review or develop a deeper understanding of the simple machine, lever. It includes plans for scientific explorations, that humans have used over the years, to develop their understanding and create tools for survival and improve our quality of life. Scientific investigation, which makes careful observers to investigate how levers work and have improved our world with creative people using their ideas to develop technology to improve our lives.
The unit goes beyond an introduction of levers and provides information for a deep understanding of the lever as a simple machine. Additionally, it includes pedagogical information to provide deep insight into different aspects of planning and teaching.
Important preparations: To save a lot of time it is important to select a lever system and know how it will be used by the learners for their exploration. The easiest to manipulate and use to collect data is an equal arm balance. The characteristic that makes it easiest to use, is the fact that it can be balanced before weights are added to explore the relationship between weights and distances.
However, learners are often not convinced an equal arm balance works the same as a lever. Therefore, to use a system that looks more like a typical lever adds complexities, with the biggest being: the weight of a lever arm isn't balanced when the fulcrum is not centered. This can be resolved with counter weights placed on the lever arm before adding a load and measuring the effort force, see example.
Another problem is using a spring scale. Spring scales come in a variety of sensitivities and it is important to match the spring scale with the type of lever system and amount of weights being used. The K'Nex levers are interesting and easy to make, if you have access to them. However, they are made of plastic and will bend when heavier weights are used. Therefore, smaller amounts of weight will need to be used and it will be necessary to have a scale sensitive enough to measure gram increments.
The obvious problem: what materials to use as levers. If heavier weights are to be used, then solid rulers or wood works well. The biggest problem using wood is the weight of the not being balanced when the fulcrum is not centered. This can be negated with counter weights and balancing the system before exploring different lengths.
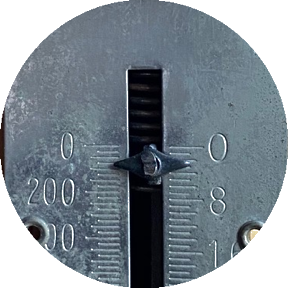
One last problem is the position of the spring scale. Upright or upside down. Many learners will need to explore a lever system and measure the effort with a spring scale upright and upside down to see there is no difference. See lever system with pulley.
Background information:
This plan is designed for students who have very little prior knowledge of simple machines and levers. However, they should be advanced enough in their conservation skills, such as believing variables that affect simple machines will do so consistently and are probably conserved across the Universe (always be). Helpful to have some knowledge about an equal arm balance.
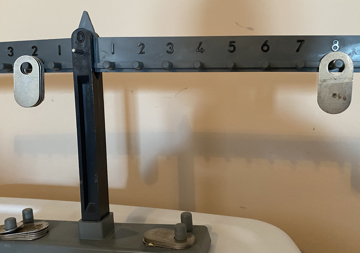
People may think machines have a motor or machines can provide more energy than used to run them. However, simple machines do not have motors, however, they are within many mechanical devices and can make work relatively easier by exerting force over longer distances.
Ideas for possible inclusion:
- Big ideas
- Physical science concepts related to lever.
- Science inquiry and process and doing science
- Science perspectives, attitudes, and habits of mind
Resources for related study topics:
- Balance & stability - what makes objects stable & unstable
- Simple machines: Lever, inclined plane, pulley, screw, wedge, wheel and axle, and gears.
Big ideas, concepts, facts, and outcomes
Big ideas
- Objects can be explored to make claims about their forces and the variables the affect how those forces change, are constant, how to measure them, and use them to gain a mechanical advantage.
Related concepts and facts
- Better decisions (claims) are made when information is verified, with evidence and reasoning, before being considered accurate and used to reason and develop explanations and models to understand the world and make decisions.
- People make better decision when they understand and consider the positive and negative influences that effect their decision making.
Outcome
Use accurate verifiable information to consider and decide how objects can be balanced or made more stable.
Science concepts: physical, earth, life
Big ideas
Lever is a simple machines, which can change the direction, transfer a force from one place to another, increase the amount of a force, and increase the distance or speed of a force as do all simple machines.
Related concepts
- Levers (simple machines) are tools used to make work easier (give their users a form of advantage when working).
- A lever is a simple machine.
- It is the most common simple machine.
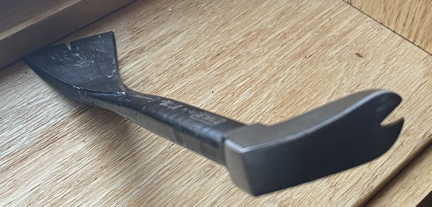
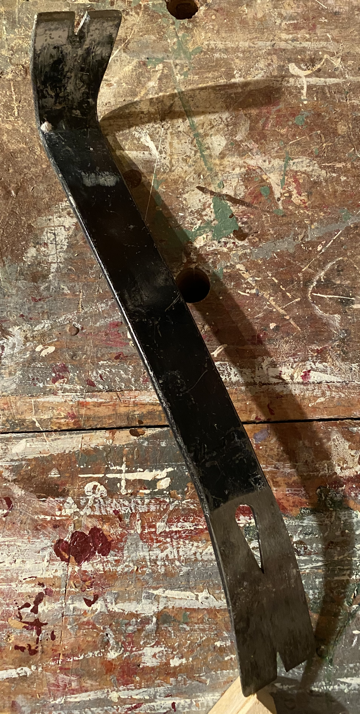
- Teeter-totters, crowbars, can openers, brooms and arms are all examples of levers.
- They can be found in almost every room in a house and are incorporated into the construction of cars, refrigerators, toys, televisions, sports equipment, and the human body.
- A lever is a rigid bar that pivots or turns, around a point that is used to move an object at a second point by a force applied at a third point.
- If a lever pivots on a fulcrum, that is in the middle of the lever arm, a push down (force) on one end will make the other end go up.
- A lever is a simple machine that people use to gain an advantage, such as making work easier.
- There are three types of levers or classes. Classified by the relative position of the arm, fulcrum, and load.
- Advantage is the benefit obtained by using a lever.
- Effort is the force needed to move a load or overcome a resistance.
- Fulcrum is the point where a lever arm pivots.
- Load is the mass (resistance) lifted or attempted to be lifted.
- If more than one force acts on an object along a straight line, the forces will reinforce or cancel one another, depending on the direction and magnitude.
- Unbalanced forces change the speed or direction of an object’s motion.
- Equilibrium is a state where the net forces is zero.
- Resistance is an opposition to a force.
- Friction is resistance to motion.
- Work is force acting on an object to move it across a distance. Pushing, pulling, and lifting are common forms of work.
- Force is measured in newtons. A mass of 1 kg. pulls or pushes down (because of gravity) with a force of 10N.
Outcome
- Describe a lever is a simple machine.
- Use a lever for a mechanical advantage.
- Explain the possible different arrangements of load, fulcrum, and effort along with the advantages and disadvantages for each for three levers.
- Explain how they create a mechanical advantage in exchange for greater motion.
- Explains the lever as a simple machine whose product of the effort force and its distance from the fulcrum (for a lever) is equal to the product of the resistance force and distance from the fulcrum (for a lever).
- Explains effort force and distance is equal to the resistance force and distance; and simple machines are tools that manipulate force and distance to gain a mechanical advantage. MA (mechanical advantage) is either: The ratio between resistance force and effort force, or a multiple factor of the resistance force and effort force.
- What other types of simple machines do you use to help you do work?
Sample assessment by category
- Diagnostic - What is a machine? What are machines used for?
- Formative - Is the machine making your work easier?
- Summative - Can you name three points on a lever and their function?
- Generative - What other types of simple machines do you have at home that help you do work?
Science inquiry & process
Big ideas
Science (claim evidence & reasoning) can be used to understand and explain cause and effect in the world.
When I experiment I ask questions, create and conduct experiments to answer those questions by collecting data with observations to describe how different properties change (become variables) when objects and systems interact to construct reasonable explanations. This helps me make claims, explain what is happening, and to predict what might happen in the future.
Related concepts and facts
Inquiry
- An experiment can be created to identify variables and their effects on interactions by using if/then thinking.
- It is helpful to have a tentative answer, or hypothesis, as we try to answer our question.
- As we become more experienced at asking questions and making predictions, we improve our ability to make careful hypotheses from which we design experiments.
Process of science
- Uses various tools to gather, analyze, and interpret data.
- Use mathematics.
- Use variables to describe properties that change and can be used to explain interactions.
- Use relative position to describe changes in positions of objects when they are moved relative to a common position.
- Use systems to describe objects that interact together.
- Use interactions to explain how variables change within a system and how a system interacts with other objects or systems.
- Objects change.
- Change can be observed and recorded as before, during, after.
- Change is observed through properties of the object.
- Change can vary.
- Constancy Somethings stay the same and some things change.
- Constancy can sometimes be observed during a very slow rate of a change process or focusing on a particular property.
Technology
- Use ideas from a design process to problem solve or check their simple machine design and use: ... ask, research, imagine, plan, create, test, improve, ask, ...
More concepts for
Outcome
- Describe how the properties of levers (simple machines) change and are sometimes in equilibrium.
- Describe how changes can be observed and measured.
- Describe how science (simple machines) can be used by humans to create tools.
- Describe how a claim is made and evidence used to reason and explain how the motion and forces are related. Claims are made from observations and used to create and verify explanations.
- Identify two variables and states how each variable changes as a relationship from one to the other.
- Describe a procedure to explore variables: one variables as the manipulated/ independent variable and the other as the responding/ dependent variable. The procedure will also allow for the collection of observational data of those variables in a manner that indicates a relationship of one to the other.
Inquiry sample assessment by category
- Diagnostic - Is there a way you could find that out?
- Formative - If the lever doesn’t work then what will you do?
- Summative - How many designs did you try?
- Generative - Where else could we use if/then thinking?
Science perspective, attitude, & social concepts, facts, & outcomes
Big ideas
People use science to understand the world and make tools to improve life. By having positive habits of mind and often by working together they are able to ask questions, recognize problems, and seek answers and solutions with scientific ideas.
Related concepts and facts
- Curiosity and persistence are needed to solve and understand problems.
- I can create a simple machine if I just keep trying and use the material given.
- If one plan doesn’t work, I can try another.
- I am capable of using science to better understand the world.
- Individuals work together in teams and use tools and scientific techniques to make observations
- Many different people have made contributions to science and technology.
- Science relies on basic human qualities such as reasoning, insight, energy, skill and creativity – as well as scientific habits of mind, such as intellectual honesty, tolerance of ambiguity, skepticism, and openness to new ideas.
Outcomes
- Learners are curious enough to engage in the investigations, willing to persist until they collect enough verifiable data to satisfactorily support a logical explanation and reduce or eliminates their skepticism.
- Voluntarily listen to all appropriate suggestions so as not to overlook something, and persist until the information, reasoning, and conclusions are powerful enough to convince them to a point where they are willing and eager to describe them to others.
Inquiry sample assessment by category
- Diagnostic - What will you do if your first plan is does not work?
- Formative - Are you curious? Skeptical? Open to other’s ideas?
- Summative - Why did you try several ways to make a machine?
- Generative - How does curiosity and persistence pay off?
Social assessment to build a community of science learners
- Diagnostic - What will you do if your idea doesn’t work?
- Formative - What does your group think they should do to build a simple machine with the board and triangle?
- Summative - Was it helpful to hear other students’ ideas work together?
- Generative - What other places might you be able to use group discussions or other people’s ideas?
Pedagogical Overview
Consider if the area of study is appropriate for the learners. Do they have the background information.
Consider self assessment before the activities or include in each activity as applicable. Pre (diagnosis) and post (summative & generative). See more assessment information
- I understand how a lever works.
- I can identify levers in my world.
- I understand some levers that I use.
- I know how to explore & experiment to find answers to questions.
- I would keep trying ideas until I am satisfied that I understand.
- I am good at learning and solving problems.
Activities Sequence to provide sufficient opportunities for students to achieve the targeted outcomes.
Insert the unit focus questions as applicable.
- Activity 1 Lever - demonstrate & explore a lever, introduce terms & identify possible advantages
- Activity 2 Lift the Load - Explore how lever systems make lifting heavy loads easier.
- Activity 3 - Lift the Load alternatives continue exploration with different variables: loads, efforts, fulcrum, positions. (For example: keeping the effort position the same, spring scale at one location on the lever, & moving the load relative to the fulcrum)
- Activity 4 - Lever Classes investigate how the location of the fulcrum allows a person to classify a lever
- Activity 5 - Real - World Levers discuss and explore levers found in the world
- Activity 6 - Prepare a summary presentation about levers & the different classes.
Focus question
Unit focus question:
What is a lever and how does it work?
Sub focus questions:
- What do we call an object that does work?
- Why is a lever a simple machine?
- What is a simple machine?
- What can you use a lever for?
- Why were levers invented?
- Why is it a good idea for people to know how to use a lever?
- What are the advantages and disadvantages of using a lever?
- What is force?
- How do scientists learn about different things?
- How do I use science inquiry?
Materials
- For each student: goggles
- Safety Precautions: Remind learners that safety goggles must be worn at all times. Discourage students from launching the load. Warn them of the potential danger to themselves and others. And if desired provide a safe environment and procedure to for catapult explorations.
- Spring scales, rubber bands, loads with rubber bands to hang them (cubes or other weights) , half-meter sticks or other sticks, binder clips, dowels or round pencils, pencil-cap erasers, science journal to include lab notes
- Lab note 1 - Lever & advantage
- Lab note 2 - Lift the load
- Lab note 3 - Lift the load alternatives
- Lab note 4 - Lever classes
- Lab note 5 - Levers in the world
- Lab note 6 - Summary presentation about levers & the different classes
References and other resources
- Spring scale investigation - two spring scales measuring each other?
Scoring guides suggestions (rubric)
Simple machines (scoring guide)
Top level
- Explains the lever as a simple machine whose MA (mechanical advantage) is either: The ratio between resistance force and effort force, or a multiple factor of the resistance force and effort force. And For a lever, the product of the effort force and its distance from the fulcrum is equal to the product of the resistance force and distance from the fulcrum.
- Explains effort force and distance is equal to the resistance force and distance; and simple machines are tools that manipulate force and distance to gain a mechanical advantage.
- Concretely - A 100 gram weight 1 cm from the fulcrum (100 g * 1 cm = 100 g/cm) would need a 5 gram weight 20 cm from the fulcrum (5 g * 20 cm = 100 g/cm) to balance or begin to lift it.
- The longer the lever, (effort force from the fulcrum) the less force needed to lift a load. And the closer the load is to the fulcrum, the less effort needed to lift the load.
- Effort force is less than the load, but it needs to move a greater distance.
- Identifies simple machines and claims they help do work.
Lower level
Lesson Plans
Activity 1 - Lever and advantage
Materials
Safety Precautions
- Remind learners safety goggles must be worn at all times.
- Warn them of the potential danger to themselves and other students.
- Discourage them from sending load material flying across an occupied area. Warn them of the potential danger to themselves and other students.
For each student
- Goggles
For each pair
- rubber bands, loads with rubber bands to hang them (washers or other weights) , half-meter sticks or other ruler or stick, binder clips, round pencil or dowel, pencil-cap eraser, science journal / lab notes
- Lab notes 1
Focus questions:
- What is a lever?
- What can you use a lever for?
Learning outcomes:
- Describe a lever is a simple machine that changes direction and amount of force.
- A heavier load can be lifted with a smaller force (applied through a greater distance than the load is moved). Or a lighter load can be lifted with greater force (applied through smaller distance than the load is moved).
Suggested procedures overview:
- Put learners in groups, focus their attention, and assess their initial understanding of the focus questions.
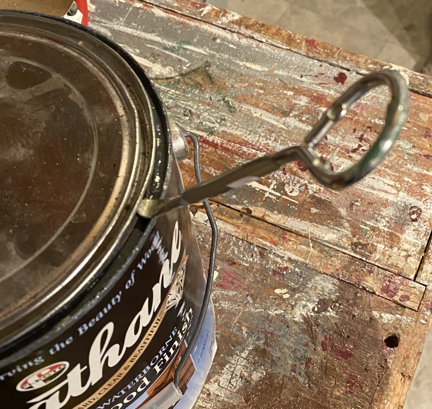
- Explore how to open a can of paint
- Explore a simple lever system with touch.
- Explore lifting different weights at different points on a lever to determine a qualitative operational definition.
Exploration
- Put learners in pairs.
- Ask. What would you use to open a can of paint? Paint can opener
- Have them demonstrate (mime) the actions for each of the tools suggested to open a paint can? Listen to all suggestions. Do not give any indications as to a right or wrong answers.
- Explain that the tools people use to open cans of paint are used as levers.
- Why do they? They (levers) give the person an advantage to open the can.
- Introduce the lever journal (lab notes) and explain they are starting a series of scientific investigations with lever systems and will record their observations and explanations for them.
- Set up and demonstrate the first lever system.
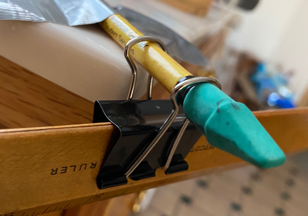
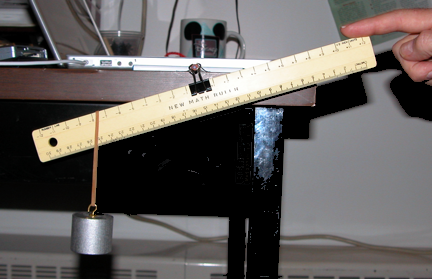
- Tape a pencil to the desk with duct tape (one close to the edge of the desk and one at the very end of the pencil) so the pencil hangs over the desk about 5 cm.
- Take the half meter stick and attach a binder clip in the middle (this will be the zero position)
- Flip the metal loops of the binder clip up.
- This will be the lever arm.
- Slip the loops over the pencil so that it will rotate.
- Adjust the location of the clip on the half-meter stick until it balances.
- Slide a wedge-shaped eraser on the end of the pencil.
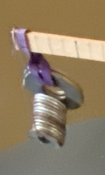
- Hold up some weights (washers) and attached rubber bands.
- Point out how to hang the weights with the rubber band on the stick at different positions.
- The mass lifted by the lever is the load.
- Hang the load, using the rubber band, on one side of the half-meter stick.
- The effort is the force (push or pull) needed to lift or move the load.
- Explain when the load hangs on the lever it pulls down with force.
- Show learners how you can move the load up and down using one finger on the opposite side of the lever.
- Put students into pairs to set up their own lever systems.
- Allow time for free exploration. About five minutes
- Have them explore and record their ideas in their lab notes.
- Can you lift the load using one finger?
- Does it always take the same amount of force to lift the load?
- Where should you press to lift the load with the least force?
Invention -
- Bring class together to discuss the advantage of using levers to lift heavy objects.
- Ask. How can you use data to explain a lever system?
- What tools did you use to gather data? lever system ...
- What is an an operational definition for lever? put a load on one end and push down on the other to lift the load.
- How did they measure? used their finger and felt how easy or hard it is to lift.
- How did they learn? it was easier to lift if pushed at the end of the lever, and if the load is closer to the clip (fulcrum)
- How did what they do compare to what scientists do? Thought of questions or ideas and experimented or explored to collect data to answer the questions.
- Ask if they moved the load (weights) to different places on the lever arm? yes or no
- How can they use what they learned today?
- Have them record their findings for the day and write a short paragraph about how levers provide individuals with an advantage.
- Ask how they might collect more accurate measurements than with their fingers? spring scale?
- Suggest they will explore more in the next activity. maybe use the lever system with the load hanging at 15 cm and 30 cm.
Activity 2 - Lift the Load
Materials:
- Spring scales, load (washers, weights, cubes, ...), rubber bands, half-meter stick, binder clip, round pencil or dowel, pencil-cap-erasers, science journal for lab notes
Focus questions:
- What mathematical relationship can be used to further explain the operational definition of a lever system?
Learning outcomes:
- Use a lever system to collect data to begin to determine a relationship for load, effort, and distance of both from the fulcrum. Use this activity as exploration of variables to learn how to investigate more sytematically in activity 3. Learners who get into science or math will begin to think about how to discover a quantitative / mathematical relationship. However, a quantitative understanding like: The longer the lever, (effort force from the fulcrum) the less force needed to lift a load. And the closer the load is to the fulcrum, the less effort needed to lift the load is very appropriate as an outcome.
Suggested procedures overview:
- Put students in groups, focus their attention, and assess their initial understanding of the focus questions.
- Activity. Set up lever arm balance system. Decide whether every pair should investigate differently or everyone should decide on the same one variable to manipulate, collect data, create an operational definition, and work toward a mathematical relationship. Use this activity as exploration of variables to learn how to investigate more sytematically in activity 3.
Exploration
- Put learners in pairs.
- Review previous lesson.
- Ask. What did you learn in the previous lever activity? accept all answers
- Ask. What happens when the load is moved relative to the fulcrum? harder or easier to lift ...
- Ask. What happens when the effort force is moved relative to the fulcrum? harder or easier to lift ...
- Ask. How could the effort force and load be measured better than with a finger? scale
- Decide on a set up like the lever arm balance system. Select one variable to manipulate, collect data, create an operational definition, and work toward a mathematical relationship. Don't push, as activity 3 will provide more experience and data.
- Demonstrate a set up for teams to use. Sample with fulcrum in the middle. The lever is balanced, because the fulcrum is in the middle. The setup is balanced with the washers being the same weight as the weight of the spring scale. Interesting ideas to investigate spring scales right side up, up side down, and measuring each other...
- Decide and create a load. HEADS UP note - If the fulcrum isn't centered (lever arm balanced or in equilibrium) when the load is hung on the lever arm, the added weight may not be enough to counter the weight of the lever arm in some systems. Sample script for uncentered fulcrum.
- Put a light load on the lever system and attempt to measure the force needed to lift it.
- The lever arm may pull down the lever without extra force or ...
- If may pull it down when the spring scale is added or ...
- A slight tug will pull it down and the scale will read zero.
- Ask. How is the load being lifted with no or lttle effort?
- How is that possible? the weight of the lever arm is lifting it
- What should we do? Balance the system before measuring.
- How? add weight until arm is horizontal
- Put the scale 25-cm from the fulcrum on the other side, balance it with washers on a rubber band, and say the system is in equilibrium.
- Put the load with the balancing washers at 5-cm from the fulcrum.
- Tell the learners, the load is 5 cm from the fulcrum.
- Pull on the scale.
- How much pull is being applied to lift the load? read scale in grams, Newtons, or ounces. Weight and Newtons are the same, in this case, on Earth
- 4 Grams is 0.0392 Newtons
- Record the force.
- Review the procedure for each of the groups, then let them explore or experiment.
- Demonstrate how to use a spring scale to measure the load.
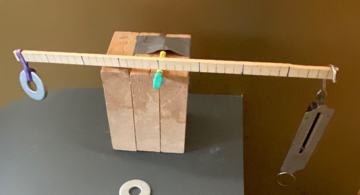
Lever arm balanced with fulcrum in the center and spring scale weight balanced with counter weights (washers).
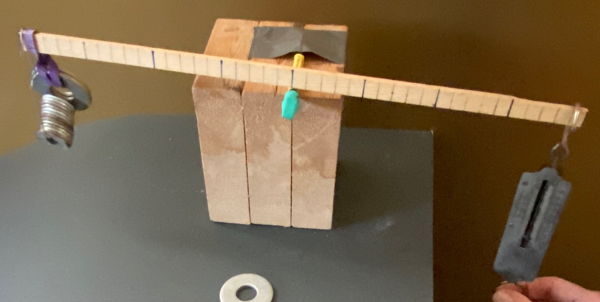
Lever arm balanced, with load added and spring scale ready to read.
- Ask. What is the weight (mass) of the load?
- How much effort force do you think will be needed to lift this load (display load) with the lever system? more or less
- Learners familiar with a screw driver or pry bar as a lever may not be satisfied exploring levers with the fulcrum in the middle. And want to explore ones with the fulcrum closer to the load. To collect reliable data, for those,
possible steps migh be:
- To model or demontrate examples on how to balance the system (put the system in equalibrium) before collecting data. The example below shows the lever system balanced. Another length of gray could be added and then it would need to be balancee for the longer lever arm. Three data points could be measured. At the first yellow joint, the second yellow joint, and third third joint if another gray rod is added.
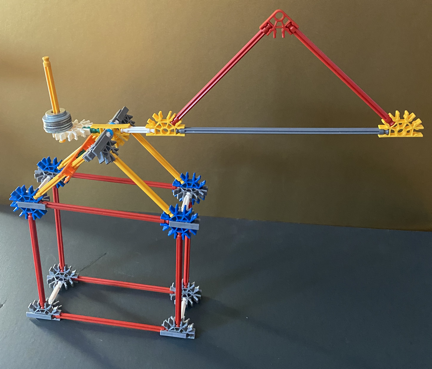
- Ask. How would you measure the effort force needed to lift the load with our lever system? With a balanced system, hang weights (mass) at the load position. Then with the spring scale measure the effort force needed to raise the load in each of three positions.
One way to demonstrate this problem is to hang a load that is less than the mass of the lever arm and show the lever will lift it before the spring scale is attached to lift the load.
- To model or demontrate examples on how to balance the system (put the system in equalibrium) before collecting data. The example below shows the lever system balanced. Another length of gray could be added and then it would need to be balancee for the longer lever arm. Three data points could be measured. At the first yellow joint, the second yellow joint, and third third joint if another gray rod is added.
- After learners understand how to measure, decide on variables to manipulate, which will be controlled, and the reponding variable. Can change placement of loads, weight of load, position of effort, position of fulcrum.
- Have some one demonstrate how a variable will be manipulated, data collected, and explain how other variables are controlled. Make sure they understand the system needs to be in equilibrium before placing the load and using the scale to measure the effort force to lift a load.
- Have learners review what data they will record.
- Data recorded could be manipulated variable and responding variable.
- Controlled variables. Mass for the load if in the same location and the same amount.
- Manipulated variable. Effort distance from the fulcrum is changed (say 5 cm first one and 20 cm for the next two) Remember each time the load or scale is moved the system needs to be adjusted to put the system into equilibrium.
- Responding variable. Effort force determined by the spring scale.
- If learners want to record more, then let them, but the next activity will add additional data so don't need to push if they are not ready. (for example the distance of the load from fulcrum and distance of the effort from the fulcrum.) If a graph is made the manipulated variable goes on x axis and responding variable on the y axis. See graphing sheet.
- Allow plenty of time to explore, collect data, and record it in their lab notes.
- When completed have them share and display the data so the class can see it.
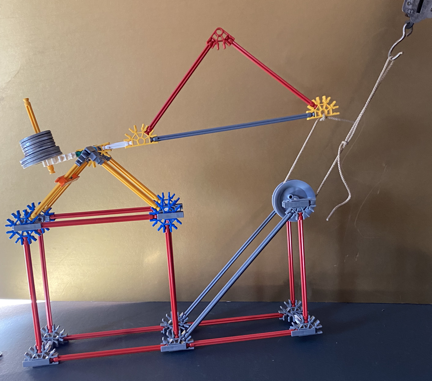
- Some learners might want to make the system so the spring scale is upright when they measure. To do so a pulley can be added. If a ruler and pencil are used to make the lever system, A round pencil can be taped below to wrap a string around to check the weight upright and upside down to observe there isn't a significant difference. See also an example of K'Nex lever and pulley system

Invention
- Ask. What does the data, and graph if made, help us understand about a lever system?
- What relationships can be made? (if the only relationship supported with the data is effort force is reduced when the force is applied to the lever arm further from the fulcrum, that is good. The following questions will help with more experience and additional data in activity 3 Lift the load alterations.
- How does the effort force and distance from the fulcrum relate? changes the effort needed to lift the load. Or more detailed if learners offer more.
- How does the effort force and the distance it traveled compare to the load and the distance it moved? When the effort is applied further from the fulcrum than the load is from the fulcrum, then the effort arm moves more than the load.
- If data wasn't collected to answer all of these questions, then ask them how to design additional explorations to collect more data.
- Review:
- What tools did they use to gather data?
- How did they measure?
- How did they learn?
- How did what they did compare to what scientists do?
- How can they use what they learned today?
- Then ask each student to respond to these three questions in their science journal.
- Does the lever provide an individual with an advantage?
- Did the amount of force needed to lift the load change when you moved the position of the effort?
- What is the relationship between the position of the effort and the amount of effort needed to lift the load?
Discover
- Ask. Where are levers used in the world?Do you think there is a relationship that can be used to predict mathematically how a lever system will operate.
Activity 3 - Lift the Load alterations
Materials:
- Spring scales, load (washers, weights, cubes, ...), rubber bands, half-meter stick, binder clip, round pencil or dowel, pencil-cap-erasers, science journal for lab notes
- Lab notes 3
Focus questions:
- What mathematical relationship can be used to further explain the operational definition of a lever system?
Learning outcomes:
- Use a lever system to collect data to support a mathematical relationship for load, effort, and distance of both from the fulcrum.
- Diagram a lever and label: the fulcrum, the load, and the effort force.
Suggested procedures overview:
- Put students in groups, focus their attention, and assess their initial understanding of the focus questions.
- Activity design explorations that manipulate one variable at a time (move effort distance from fulcrum, move load distance from fulcrum, move fulcrum location relative to both) and control all others, collect data, create an operational definition and mathematical relationship.
Exploration
- Put learners in pairs.
- Ask. What did you learn about the lever and the advantage it provides to lifting a load.
- Diagram a lever and label: the fulcrum, the load, and the effort force.
- What do you think would happen to the effort needed to lift the load if the scale stayed at one locations on the lever and the load moved farther and farther from the fulcrum?
- Ask. What should we explore to get more data and a better understanding?
- Decide and share a lever system to use to experiment with select variables. Example.
- The load is placed at one end of the lever, say 5 cm from the fulcrum (controlled variable), and the distance of the effort force from the fulcrum (manipulated variable) can be changed by 10 or 20 cm for three or more trials. The effort force (responding variable) is measured.
- The load is placed at one end of the lever, fulcrum at 5 cm and the load is changed (manipulated variable) by increments (depending on the lever system say 50 grams) and the effort force is measured (responding variable) at the same distance (controlled) or moved (responding).
- Have the learners get into groups and discuss what may happen.
- Have each learners discuss what they will record in their notes.
- With learners in pairs, have them begin the experiment and record their findings in their lab notes.
- Observe the learners as they work and make sure each group is making progress.
- Help learners or groups who may become confused throughout the process – especially keeping the system in equalibrium.
- Have learners display their data so all can view
Invention
- Have each group review their data by providing the following information.
- How did you measure?
- How did you collect your data?
- What did you use to gather your data?
- What data did you collect?
- Organize the class data to help with comparison (table, chart, or graph).
- What is the relationship between the locations and weights of the load and the effort force and locations to move it?
- Can you find a relationship?
- Why is the location of the load an important variable in the lifting process?
- How do your results of yesterday’s experiment compare with those of today?
- Tell. Write or review your responses to these questions in your journal.
Discovery
- Ask. Where are levers used in the world?
- Discuss how levers are used in different ways. Make a class collection of tools or pictures to illustrate levers in use.
Activity 4 - Lever Classes
Materials
- Spring scales, load (washers, weights, cubes, ...), rubber bands, half-meter stick, binder clip, round pencil or dowel, pencil-cap-erasers, science journal for lab notes
- Lever and 3 classes fact sheet
- 3 lever diagram posters
- Lab notes 4
Focus questions:
- How levers are used in different ways?
- How can levers be classified into a small number of levers?
Learning outcomes:
- Describe the location of levers in different tools.
- Classify levers, from different tools, into one of three classes.
Suggested procedures overview:
- Put students in groups, focus their attention, and assess their initial understanding of the focus questions.
- Use logic to move the placement of the load, effort, and fulcrum to arrive at the classification of three classes.
Exploration
- Ask. How levers are used in different ways? Openers, pry bars, crow bars, Don't worry about a comprehensive list, more will come with later activities.
- Set up a simple demonstration lever system.
- Review. The parts of a lever system and show them with an example. Lever arm, fulcrum, load/resistance and effort/ force.
- Ask.
- What advantages do levers provide?
- How do scientists use levers in their work?
- Demonstrate. Lever system set up. NOTE the following sample is for a lever with the fulcrum in the middle of the lever arm.
- Hang a load on your lever.
- What is a force? push or a pull
- Have learners explain, that when the load hangs on the lever or on the spring scale, it pulls down with a force.
- Now place a load at 20 cm. Place the spring scale at 10 cm on the other side of the lever.
- Will the effort needed to lift the load be more, less, or the same as the pull of the load?
- After the learners make their predictions, lift the load and have someone read the effort. Ideally the effort required or scale reading will be about twice the force of the load pulling down.
- Is the fulcrum always right in the middle of the lever arm? no
- What happens when the lever is not in the middle? depends on which way it moves
- Would it still be a lever? yes
- Is there any advantage to moving the fulcrum to new locations along the lever arm? depends on the task
- Explore the possibilities,. The closer the fulcrum gets to the load, the easier the load is to lift and the longer the lever arm the easier to lift. Operational definition.
- Tell the students they have been working with class-1 lever systems.
- Class-1 levers always have the fulcrum somewhere between the load and the effort.
- Draw a picture to add to the fact sheet.
- Ask. Can you think of other arrangements of load, effort, and fulcrum? logical three ways to move the fulcrum ...
- Draw their suggestions on the board, making sure that one has the load in the middle and one has the effort in the middle.
- Tell students to return to their groups and explore new ways to set up a different kind of lever system, than they did in previous activities. Try to find out what kind of advantage (if any) it provides. Allow students time to solve the problems they find with these new lever systems. It may take some time for them to realize that the effort must be applied in an upward direction sometimes. Be patient and let them explore it.
Invention
- If after some time the students are not having success, bring them back as a whole group and provide them with a couple of helpful hints. Demonstrate how to place the binder clip on the end of the lever arm. It should be placed under the zero end of the metric side of the half-meter stick. Tell students to use this side of the lever arm. You may also need to suggest that some levers might work with the effort going upward, rather than downward as they did in previous explorations.
- Allow the students to return to work in their small groups and after all groups have worked with at least one new lever system, introduce the new lever vocabulary.
- Levers with the fulcrum in the middle are class-1 levers,
- levers with the load in the middle are class-2 levers and
- levers with the effort in the middle are class-3 levers.
- In the time remaining with the rest of class, have students set up an example of each of the three classes of levers. They should notice which ones seem to provide the greatest advantage to the user.
- For closing, bring all students back together and discuss with all of them the three types of lever systems.
- What is important about the placement of the fulcrum?
- Does it always have to be placed in the same place?
- Does the placement affect the amount of effort needed to lift a load?
- Allow for a few minutes at the end so that students may journal in their notebooks about the lever classes they discovered in today’s lesson.
Discover
- How are goods moved through a manufacturing plant?
Activity 5 - Real - World Levers
Materials 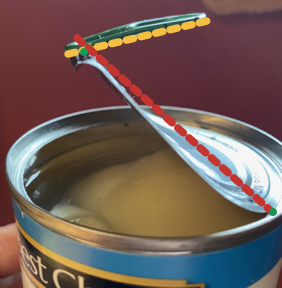
- 1 Broom, 1 Nutcracker, 1 Scissors, 1 Bottle Opener, 1 Pliers, 1 Tweezers, 1 Hammer, Half-meter sticks, Loads with rubber band, Masking tape,
- Lever Posters (optional),
- Lever Pictures
- Lever fact sheet with classes
- Lab notes -
Focus questions:
- How do you identify a lever in different tools? lever arm with three properties: resistance, effort, & fulcrum
Learning outcomes:
- Identify tools used as levers in everyday life.
- Describe a lever arm and its three properties.
Suggested procedures overview:
- Put students in groups, focus their attention, and assess their initial understanding of the focus questions.
- Activity Describe the location of levers in different tools.
Exploration
- Organize learners into pairs and groups.
- Display samples. Either real tools or pictures of tools with levers.
- Where can you find levers?
- What are some daily household jobs in which levers are used? have answer with task and tool. Sweep - broom.
- What types of machines use levers? simple machine
- Can you think of any sports or other activities that use levers? hockey stick, bat,
- Summarize with: levers are all around us. They are in every toolbox and kitchen-utensil drawer. They are found in toys, appliances, cars, and construction machinery.
- Review the classes of levers.
- Tell. Pick a tool.
- Together, model what they will do. Explore each tool, draw a diagram, label the three properties (resistance load, fulcrum and effort force), describe the kind of advantage it would give, and its classification.
- Continue for two more so have included one of each class.
- Class-1 lever has the fulcrum in the middle, with the load on one side and the effort on the other.
Model Screwdriver pry the lid off a can. What class of lever is thes when you are trying to lift the lid off a can of paint?
Explain - Where is the load, and what direction is the load acting? The load can be either a mass that you can lift or a resistance that you need to overcome. The tight lid on the can requires a lever to get it loose. The resistance is the load. You try to lift the lid up, so the resistance (load) is acting down. Have them identify the load, fulcrum, effort and class of the screwdriver and paint can. - Class-2 Wheelbarrow
- Class-3 Broom
- Class-1 lever has the fulcrum in the middle, with the load on one side and the effort on the other.
- Have each pair of earners select a tool with a lever or provide them with samples for them to select one.
- Tell them to explore a tool, draw a diagram, label the three properties (load, fulcrum and effort ), describe the kind of advantage it would give, and its classification.
Invention
- Provide time to complete the task.
- Share and discuss.
- Continue this procedure until all groups have explored several tools and diagrammed it in their journals.
- What did you find out about each tool?
- Were they all levers?
- Do scientists ever use any of these tools?
- How do these tools make our daily lives easier?
- Encourage the students to think of other things around the classroom or home that are levers. Make a list on the board and have them record that in their science journals.
Discover
- A seesaw, wheelbarrow, buckets of dirt or sand, science journal
- What are some of the levers we have discussed in the last few days?
- How can the levers be used? How do levers make our lives easier?
- How does the placement in parts on a lever make it different?
- Begin by reviewing what a lever is and the different parts and classes of levers.
- Take the students out to the playground area and have the students try and lift the teacher on the seesaw, to see how many students it takes to do so. Continue doing this exercise by moving the fulcrum. How far off the ground is the teacher?
- All levers have three parts. What was involved in using this lever? (The fixed part (fulcrum), the teacher (load) and the push of the other students (effort)). Have the students chart the data on how many students it took and the position of the fulcrum.
- Have the students walk around the playground and see if they can find other levers. What class, and the different parts where they are located.
- Next have the children try and carry one bucket full or sand or dirt from one point to another. Making sure the bucket is heavy. Have wheelbarrows close by and ask the students what they think might make it easier to move the dirt. When they say use of the wheelbarrows have them use them to move the buckets the same distance.
- Have them describe the parts of the wheelbarrow and compare with a lever. Ask them which way was easier to move and why.
- Take students back in and discuss the two types of levers used and name the parts.
- Can you think of other equipment on the playground that can be consider a lever?
- What other types of garden tools can you think of? How are those tools used?
- Maybe ask about other types of garden tools that make-work easier, make a list and have them record in their journals.
- Have the students use their journals, making diagrams and documenting the activity.
Activity 6 - Three classes of Levers
Materials
- Newsprint, Colored Pencils, electronic media software.
- Lab notes -
Focus questions:
- How
Learning outcomes:
- This activity is a cumulative activity for the unit. The learners create a presentation on levers.
Exploration
- Organize learners into groups and pairs.
- Begin by having the learners give an example of the three classes of levers. Have a learner come to the board and put up a simple drawing of the lever and label the parts and class.
- Once the class has discussed the levers and classes, divide your class into three groups. The learner will then draw from the three classes to see which class they will do a report on.
- The groups will begin by drawing pictures of levers in that class and writing explanations as to how it works. The learners will be asked to create a presentation that is no longer than 10 frames and no shorter than 8. In the presentation they will be asked to talk about how their levers work, the different parts of the lever for at least 4 examples. Each will be responsible for at least one frame.
- Over the next class periods the learner will create, edit, and present their final product. The teacher will oversee and help in any trouble spots the groups may have.
Invention
- Regroup as a class and groups demonstrate their projects.
- The learners will each present their part of the presentation, telling what it is from their frame they learned. The teacher will assess the learner’s knowledge of the class of lever they were assigned.
- The activity can be drawn to closure by talking briefly about each class of levers and the uses.
Lab Notes for activities
Lab notes 1 - Lever and advantage
Materials
For each group of pairs
- Rubber bands, load (washers) with rubber bands, half-meter sticks, binder clips, round pencil or dowel, pencil cap eraser, science journal
Designs
Describe what you do.
Can you lift the load using one finger?
Does it always take the same amount of force to lift the load?
Where should you press to lift the load with the least force?
How can you use data to explain a lever system?
What tools did you use to gather data?
How did you measure?
How did you learn?
How did what you did compare to what scientists do?
How can they use what they learned today?
Record your findings for the day and write a short paragraph about how levers operate (provide individuals with an advantage).
Lab notes 2 - Lift the Load
Materials
Challenge
Make
Describe what you will do.
- Controlled variables:
- Manipulated variable
- Responding variable
Procedure
Data
| Trial | Manipulated variable | Responding variable |
|---|---|---|
| 1 | ||
| 2 | ||
| 3 |
Does the lever provide an individual with an advantage?
Did the amount of force needed to lift the load change when you moved the position of the effort?
What is the relationship between the position of the effort and the amount of effort needed to lift the load?
Lab notes 3 - Lift the Load alterations
Materials
Describe what you will do.
Be prepared to answer the following:
- How will you measure?
- What data will you collect?
- What will you use to gather your data?
Data
| Trial | Load weight | Load distance | Effort force | Effort distance | Load movement | Effort movement |
|---|---|---|---|---|---|---|
| 1 | ||||||
| 2 | ||||||
| 3 | ||||||
| 4 | ||||||
| 5 |
Describe what happened.
Summary
- Does the lever provide an individual with an advantage?
- Did the amount of force needed to lift the load change when you moved the position of the effort?
- What is the relationship between the position of the effort and the amount of effort needed to lift the load?
Lab notes 4 - Lever Class
Focus questions:
- How many different kinds of levers are there?
Set up a lever system different than in previous activities.
Draw and label you system.
Kinds of levers
Draw a lever system for each of the following:
- Levers with the fulcrum in the middle (class-1 levers)
- levers with the load in the middle (class-2 levers)
- levers with the effort in the middle (class-3 levers)
Lab notes 5 - Levers in the World

Materials
Challenge
Draw five examples of levers and label effort, fulcrum, & resistance.
To get you started. You can use the can on the right to get started. There are two ...
1.
2.
3.
4.
5.
Fact Sheets
Levers & their classes
The lever is a solid bar or arm that pivots or turns about a point (fulcrum).
- It is a simple machine that helps people do work.
- Work, in science, is defined as a force acting on an object to move it across a distance.
- Force is a push or pull.
- Lifting, pushing, and pulling are common forms of work.
- Fulcrum is the point on which a lever turns.
- Load is the force of the thing you are trying to move.
- There are three types of levers.
- Levers are classified by the relative position of the arm, fulcrum, and load.
Classes of levers
A first class lever has the fulcrum in the center. Between the effort force and load (resistance / weight).
Examples
- A playground seesaw. The effort force is on one end (end doing the lifting) with the resistance load (end being lifted) on the other with the fulcrum in the middle. One end lifts an object up just as far as the other end is pushed down.
- Hammer. When pulling a nail, the nail is the load, the fulcrum is the head of the hammer, and the effort force is at the end of the handle. When the load (nail) is close to the fulcrum (claw) it easier to remove the nail with a hammer. When hammering a nail, the load is the nail, fulcrum is the part of the hammer that hits it and the effort force is the handle.
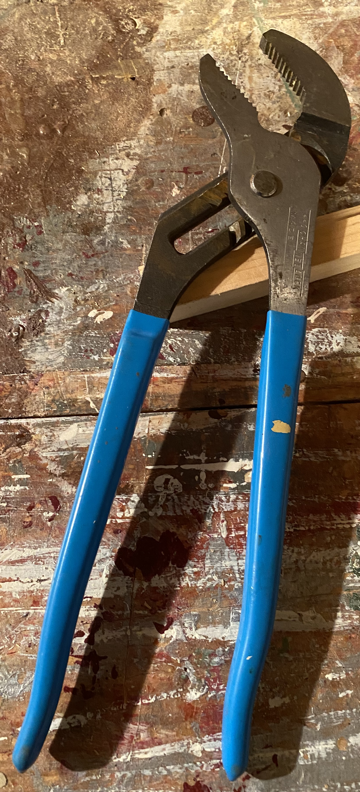
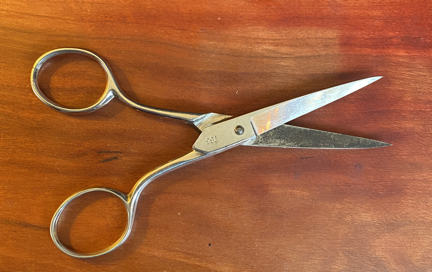
- Scissors and pliers The cutting ends of the scissors is the load (paper resistance load), the fulcrum is where the scissor blades are joined, and the effort force is the handles of the scissors.
A second class lever has the load in the center. The load is between the fulcrum and the effort.
Examples
- A wheelbarrow. The long handles are the arms of the lever, and the fulcrum is the front wheel with the load (bucket) between the fulcurm and the effort.
- Nutcracker. The fulcrum is at the joined end, the nut is the resistance load, and the end that is squeezed is the effort force.
- Bottle opener.
A third class lever has the effort between the fulcrum and load. The effort is always more than the load, (a mechanical disadvantage), meaning you always get less force out than you put in.
Example
- A fishing pole. When the pole is given a tug it pivots around the fulcrum your wrist. One end stays still or moves slightly and the other end flips through the air casting or catching a fish (moving the load).
- Bat, hockey stick,
- Broom, mop, shivel
Notes:
Photo Album
Sample levers
Wooden stick

Ruler and clip

K'Nex
K'Nex lever: comments on construction and use.
- The counter weights (washers) show the lever arm balanced before adding a load (weight), and seeing what effort is needed to lift it.
- The red triangular truss adds strength to the gray arm.
- Different efforts could be measured in the middle of the gray rod or more gray red combinations could be added to increase the length. Each time additional length is added the counter weights will need to be adjusted.
- The orange rods below the load were added to stop the lever from dropping far enough for the weights to fall off.

The pulley is added to explore if the spring scale will measure the same whether it is upright or upside down. 
Levers - simple machine

